How to Tie a Head Scarf - a Step by Step Guide
Learning to tie a head scarf is not just a practical solution to a bad hair day or sun protection; it’s also a fashionable accessory that can elevate your entire look.
If you are experiencing hair loss, a head scarf can provide a beautiful, comfortable alternative to wigs or hats.
Whether you’re aiming for a classic vintage vibe, a bohemian flair, or a chic and modern appearance, learning how to tie a head scarf can open up a world of possibilities.
In this step-by-step guide, we’ll show you how to tie a head scarf with confidence, transforming your everyday style into something truly extraordinary.
Start With the Right Scarf
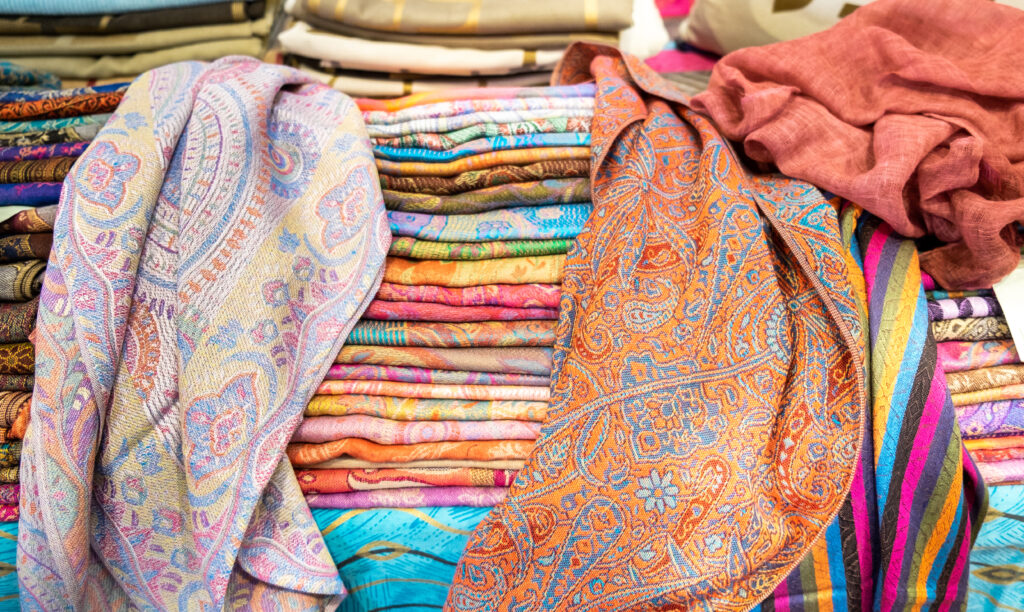
There are many types of scarves, big small, square and rectangular – and you can use most any scarf to tie a head scarf.
There are a couple of tips on choosing the best scarf for easy tying and full coverage:
Material: Choose a material like cotton, which is lightweight and breathable and won’t slip around like a silky scarf can.
Size: If the scarf is too small, it will not give full head coverage. If you have hair, this may not be an issue, but if using the scarf as a head covering for hair loss, you will want to choose a scarf that’s large enough for full coverage.
Our favorite scarf is the 30×30 inch cotton scarf from Anokhi.
Color and Print: The sky is the limit when choosing colors and prints. If you wear mostly solid clothes, opt for a beautiful print that speaks to your sense of fashion. If you tend to wear clothes with patterns, a solid scarf will go with more of your outfits.
Black goes with everything, but it can look harsh against the face. As an alternate neutral, consider charcoal grey, gold, brown, cream, navy or denim blue.
One Scarf - Ten Looks
Scarves are incredibly versatile fashion accessories. In this article we will show you how to get ten different looks from one square scarf.
These 10 looks can multiply by using hats, multiple scarves, flowers, brooches and jewelry to make the look uniquely yours.
#1 Rosie the Riveter
Who can forget the famous portait of Rosie the Riveter. The epitome of feminine strength, you can tie a head scarf to duplicate this retro style.
- Fold your square scarf into a triangle
- Place the long, folded side of the triangle by your nape, with the center point of the scarf pointing toward your nose.
- Bring the 2 sides of the scarf up to your forehead and tie a knot.
- Roll the center point over the knot and tuck it in.
- Tie the center ties again to shorten and secure.

#2 - Classic Head Scarf
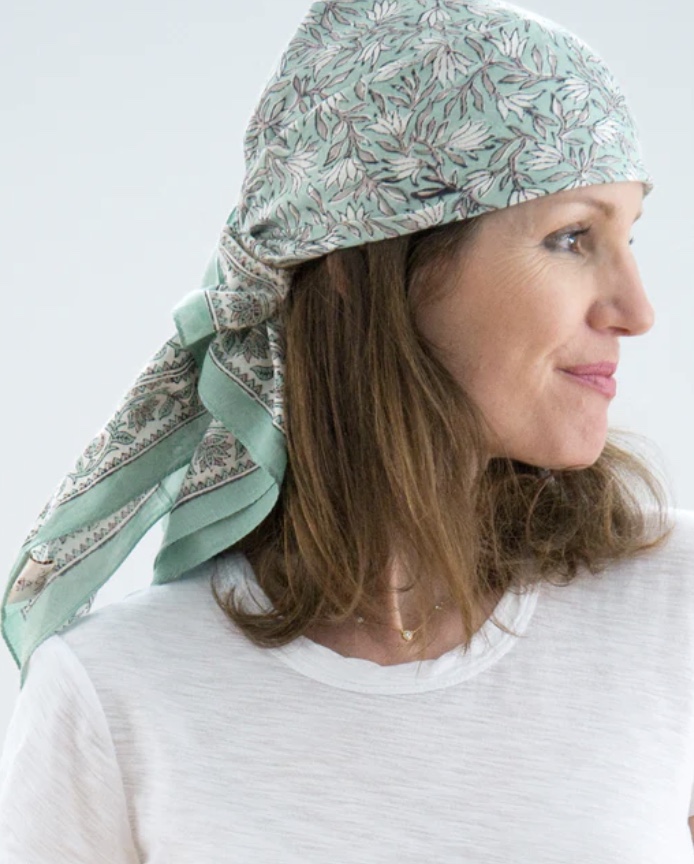
The Classic head scarf is easy to do an simply beautiful. It also forms the base for many other looks.
- Fold your scarf into a triangle
- Place the long folded edge at your forehad (place it low, near your browbone)
- Take the 2 side points and tie them behind your head, over the back point
- Take the 2 side ties and cross them under the middle point. Tie atain.
- Slide the front of te scarf up to create volume.
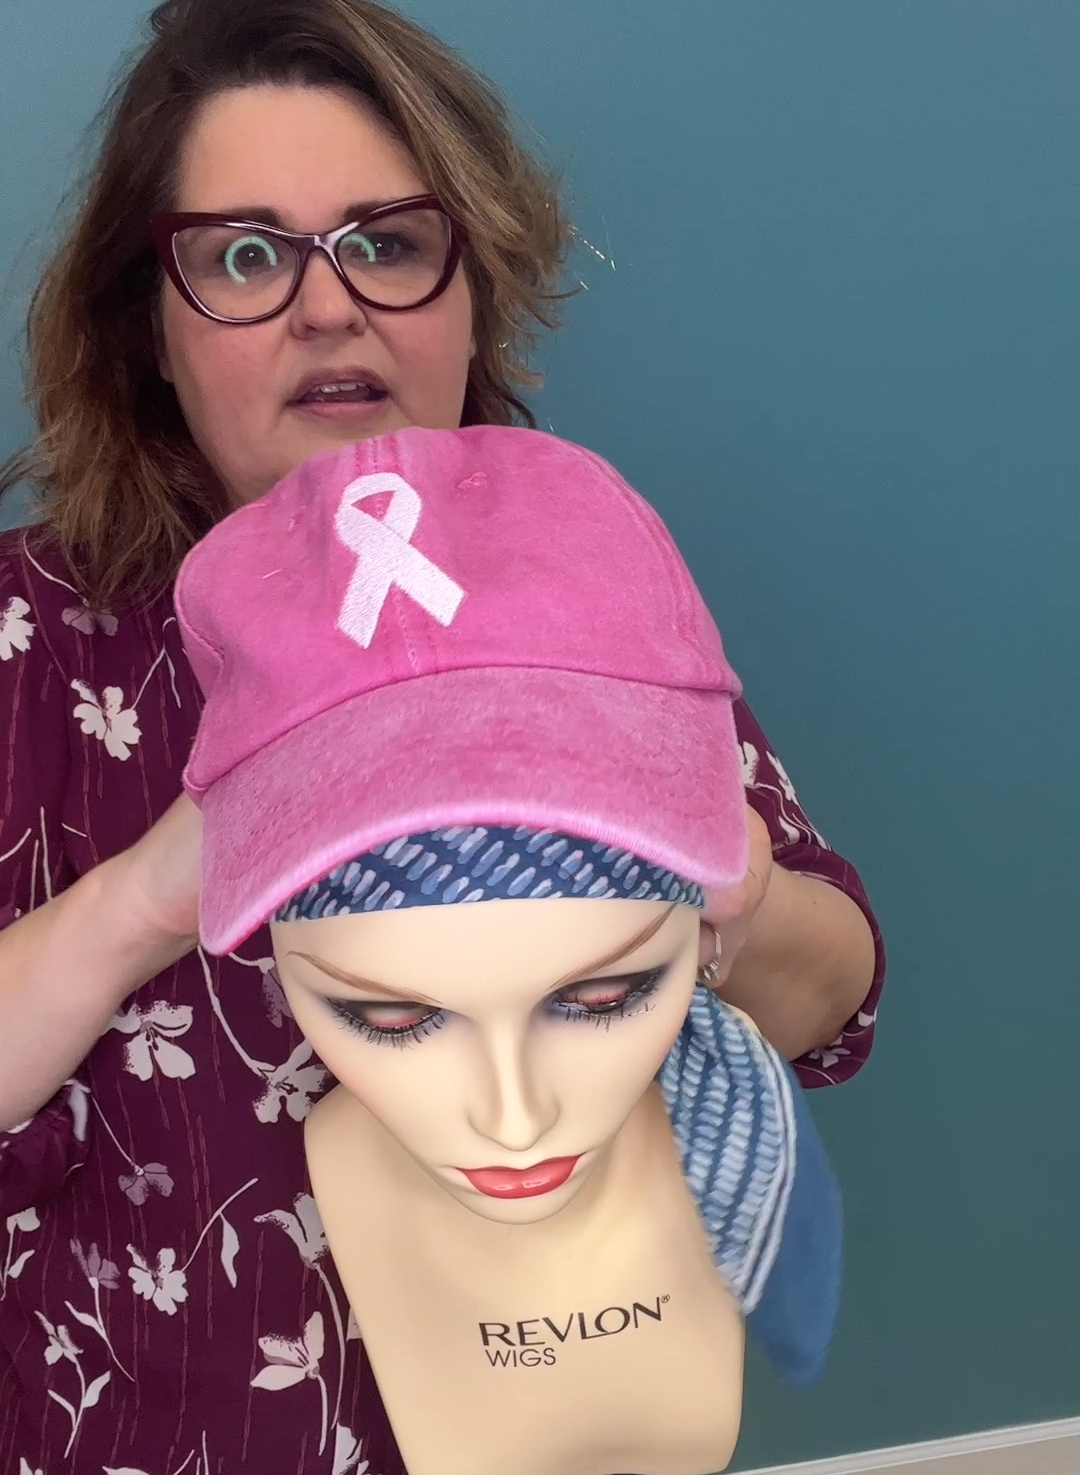
#3 - Baseball Cap
The Classic Head Scarf creates the perfect liner for a baseball cap – giving full coverage under the hat for those without hair.
- Tie the Classic Head Scarf
- Place the baseball cap over the scarf
- Pull the ties through the hole in the back of the cap if desired.
Try this look with other types of hats, big brim, bucket or cowboy!

Look #4 - Turban
Here’s another easy look you can do, starting with the Classic Scarf. This is a great look for working around the house or exercising – as it is sleek and simple without the ties hanging low on the neck.
- Tie the Classic Scarf Tie
- Roll the knot and ties under the scarf at the nape
- You’re done!
Pair this look with your favorite dangle earrings!
Look #5 - The Bun
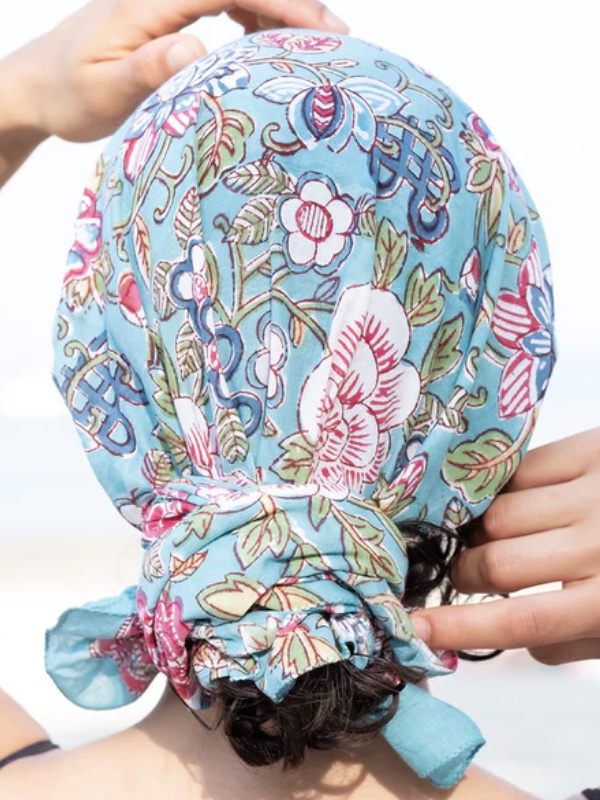
Upgrade your look with an easy to do “bun” or “rosette” look. This look is perfect for any occasion, from running errands to a night out.
- Start with the Classic Scarf Tie.
- Take 2 of the ties and wrap them under and then over the middle tie.
- Tie them in a knot.
- Tuck the ends into the knot.
- Take the loose tie in the middle and fold it up over the knot and tuck it in.
You can use a hair elastic to secure the knot.

Look # 6 - Side Bun
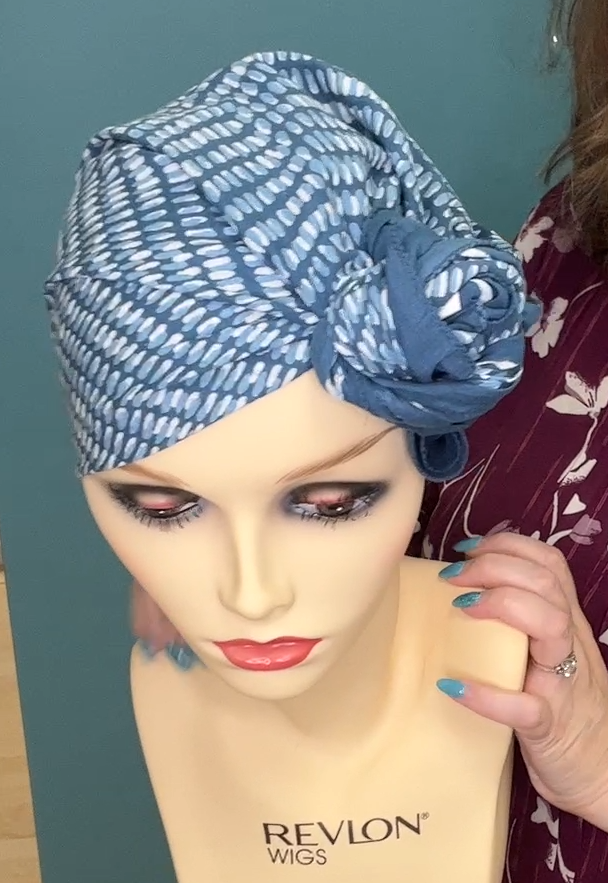
For a playful twist on the bun or rosette look, simply slide the scarf around your head until the knot is under your ear.
- Tie the Classic Scarf
- Make the bun
- Slide entire scarf around your head until the scarf is behind one ear
This boho look pairs perfectly with large hoop earrings.
Look #7 - Front Rosette
Now you can take your bun to the next level by sliding it around to the front. Wear it to one side.
1. Tie the Classic Scarf
2. Make the bun
3. Slide the bun to the front of your head and wear it just above the temple.
Try this with a pair of stud earrings!
Look #8 - Hollywood
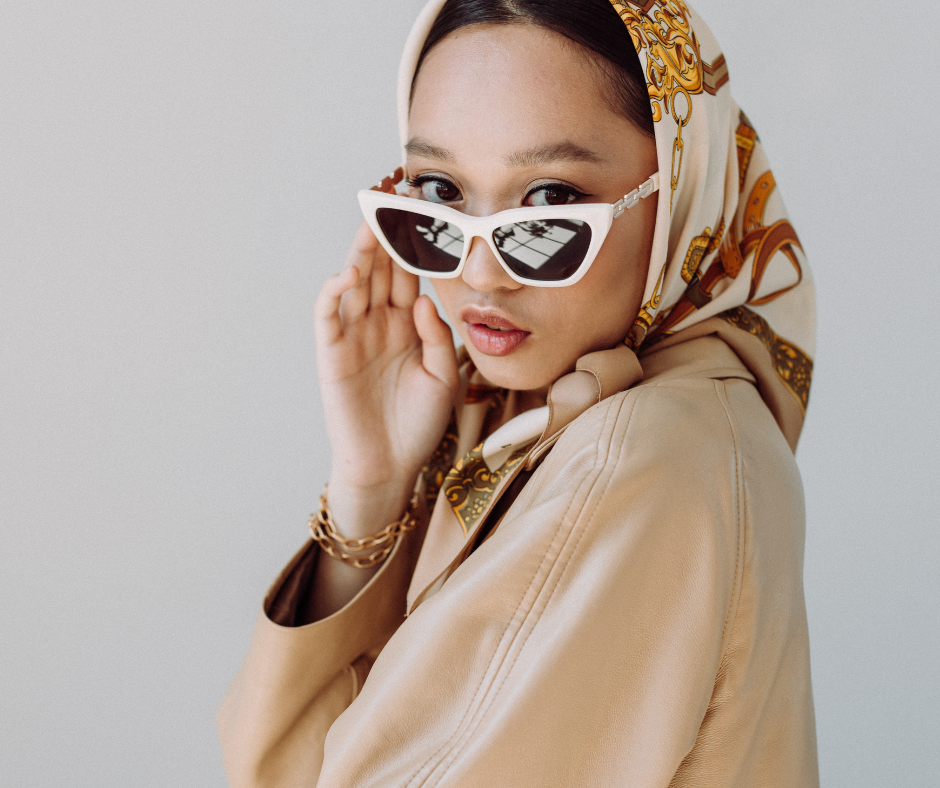
Here’s an elegant look that harkens back to 1960’s hollywood. Picture Audrey Hepburn riding in a convertible!
- Fold scarf into a triangle
- Place on head with the folded edge in front and point in back
- Tie the side ties under your chin.
- Adjust the front to your hairline.
Don't forget the big sunglasses!
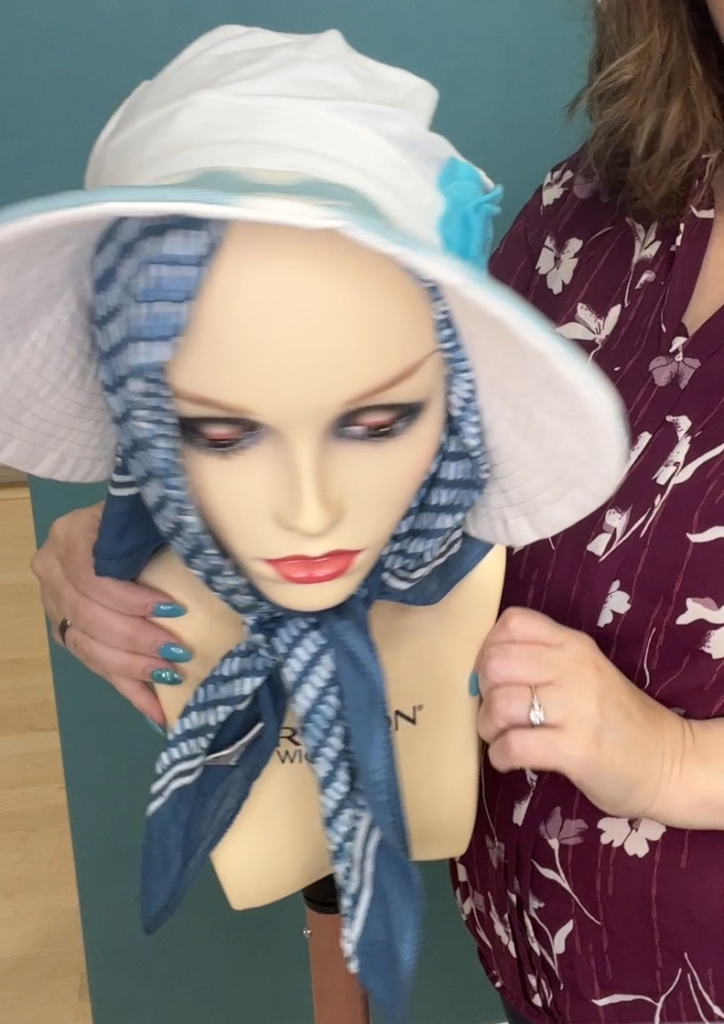
Look #9 - Big Hat
A perfect beach day combo – top off your scarf with a large brim hat. If you have a favorite straw hat, but it bothers your scalp, use a scarf underneath for comfort and sun protection.
- Tie the Hollywood Scarf
- Don the hat of your choice
Look #10 - Halo
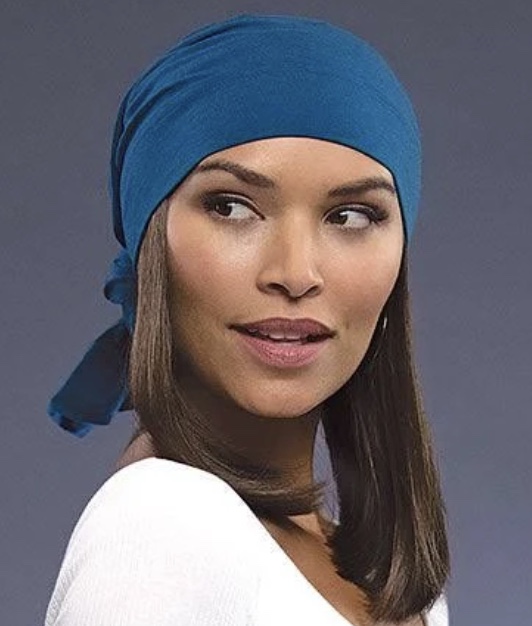
Change up the look of any scarf by adding a halo. A “hoop of hair adds the appearance of hair under your scarf without the full weight of a wig.
A must for anyone with hair loss, halos are available in a variety of lengths, textures and colors.
- Put on the halo
- Tie any scarf look you desire.
A Practical Fashion Statement
Tying a head scarf is a versatile skill that can transform your look from ordinary to extraordinary. Whether you’re embracing a retro-inspired turban, a modern classic, or an elegant wrap, there is a style for every occasion and taste.
With a little practice and creativity, you can confidently tie a head scarf and make it an integral part of your signature style. So, grab your favorite scarf and start experimenting – the world of head scarf fashion is waiting for you!
